Buy credits for email verification whenever you want
In order to check and clean your email lists you need to have available credits on your account. Each verified email address uses 1 credit. See below how to purchase credits on SafetyMails:
Remember that you need to have an account on SafetyMails. Click here to create an account.
Ways to start the purchase of credits
To start the purchasing of your credits, access you account and click on the button “+ Buy credits”.
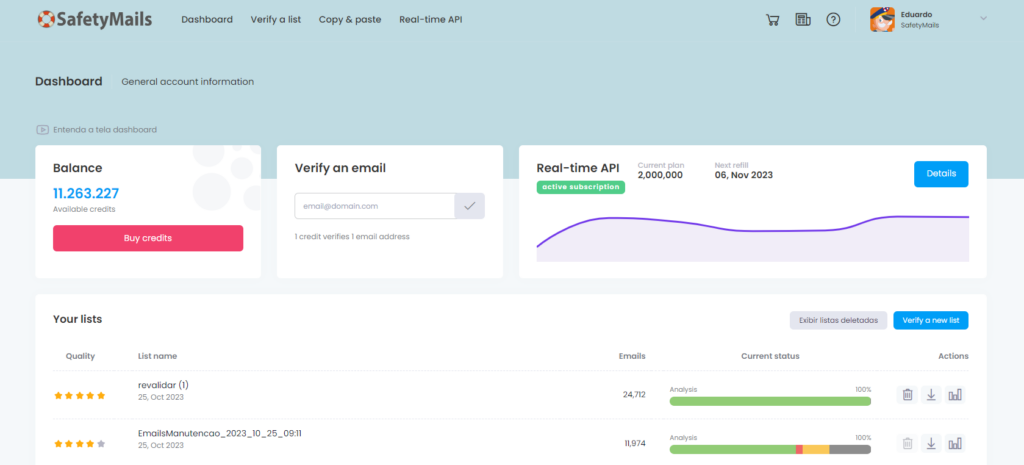
You can also purchase credits from your Dashboard, in the box “Balance”

You can also use the “Dashboard” tab to buy credits:

Step 1 – select how many credits do you want
The quick purchase menu has the same options of the standard purchase option. You need to select how many credits do you want. You will see the price. Just proceed to the next step.
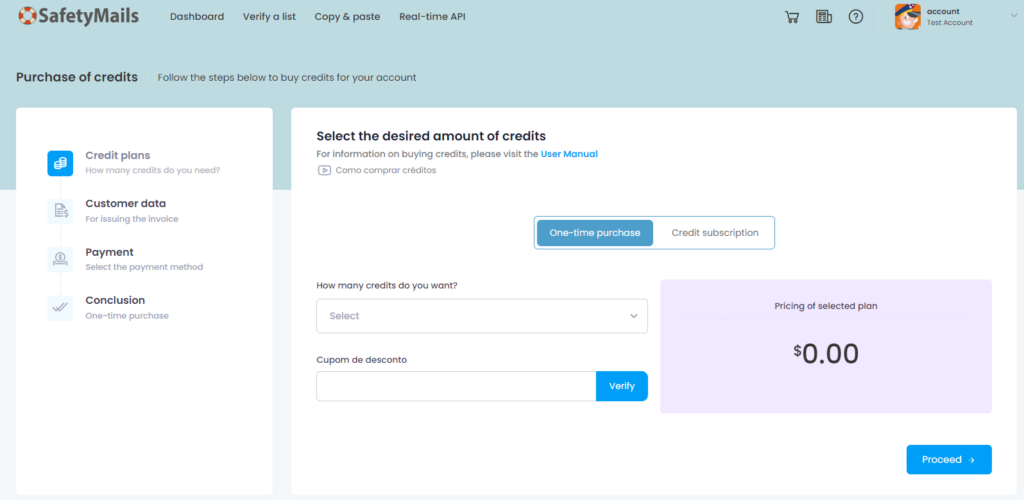
| Choose one of the options below: | Choose the amount of credits you want to purchase. |
| Discount coupon | If you have a discount coupon, type it here. Then, click on “Validate?” to validate it. If it is correct, you will get a discount on your purchase. |
| Subtotal | Display the value of your purchase. |
| Discounts | Display the value of discount that you got. |
| Total | Final value of purchase (the order is always in BRL – Brazilian Reais) |
| Do you want a subscription? (only for quick purchase menu) | Do you want to receive credits automatically every month? Click on this option to purchase a montly subscription of credits. |
| Proceed to checkout | Clicking here you go to the next step of purchase. |
Completing the buying journey
Step 2 – buyer data
On the second step of the purchase of credits, your billing data are displayed on the screen. Please check the information before proceeding.
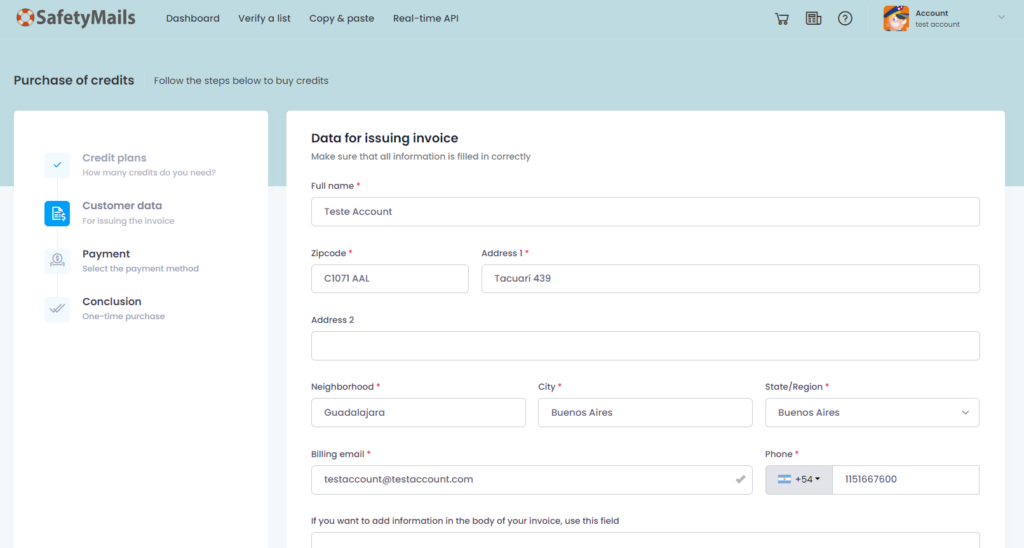
Warning: the information registered here will be used to create your invoice.
Step 3 – Information review
On the third step, you will check your order data, like the amount of credits, discounts and invoice data.
If any information is wrong, click on “change purchase” or “update personal info”.
When everything is correct, click on “Proceed to checkout”.
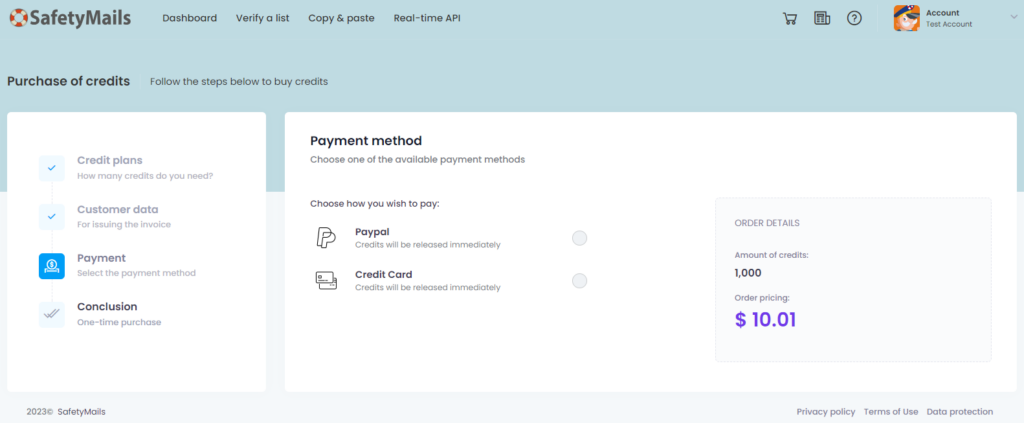

Step 4 – make the payment
The last step of purchasing your verification credits is the payment. Choose the payment method you want.
Attention: only will be displayed payment methods available for your country.
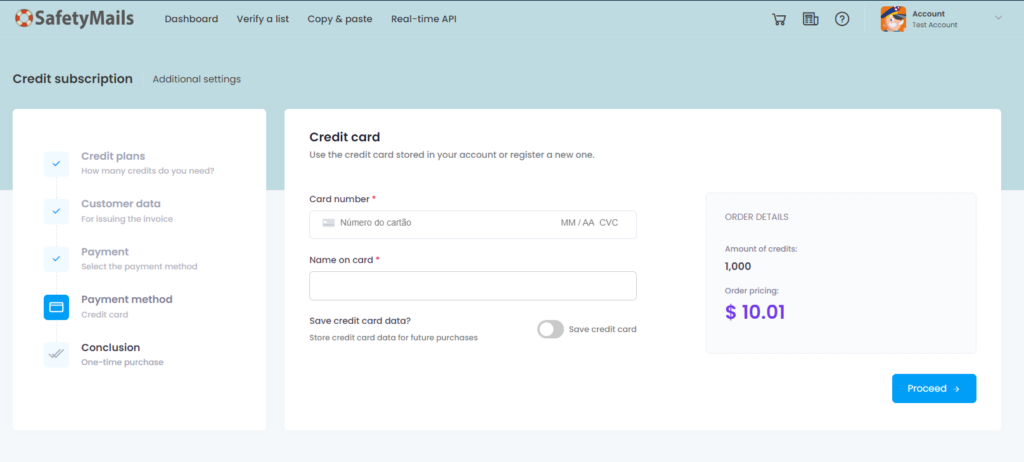
A windows asking for your payment information (like credit card number) will be displayed. Just fill in the form and finish the purchase.
Step 5 – waiting for confirmation
Once you did the purchase, the system will display a confirmation screen.
After the confirmation of payment, the credits will be added to your account.
Once the credits are available, just upload your email list file and check your reports.


