Learn how to validate emails in lists stored in your GetResponse account.
You can integrate SafetyMails with your GetResponse account by importing your lists to validate emails and update information directly in your account.
How to do the integration
Para iniciar o processo basta seguir os seguintes passos:
- Access your account on SafetyMails (If you don’t have an account, create one now and get 100 free credits);
- Confirm if your account has the necessary credits to validate emails, remembering that each email in the database consumes one credit. If you don’t have enough, you can purchase more credits;
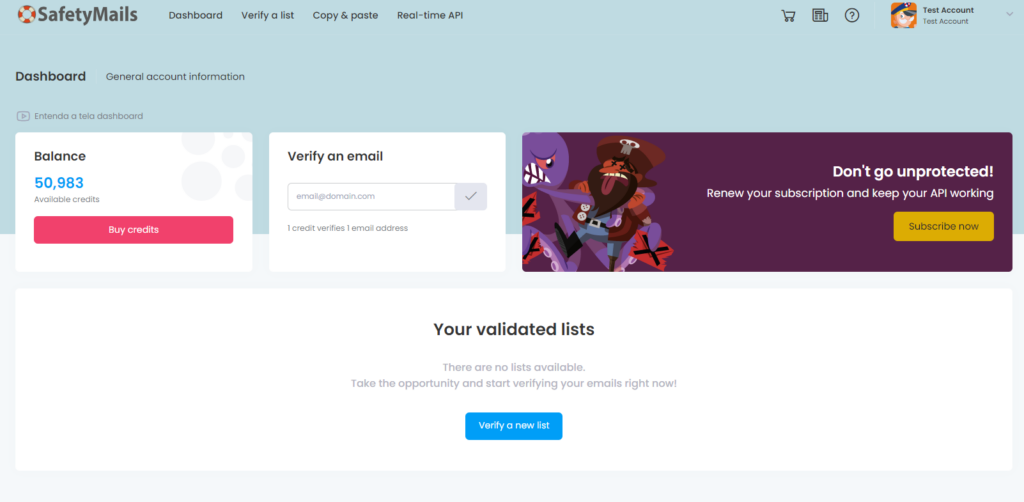
- On the main screen of SafetyMails, in the top menu, click on the “Validate a List” option.
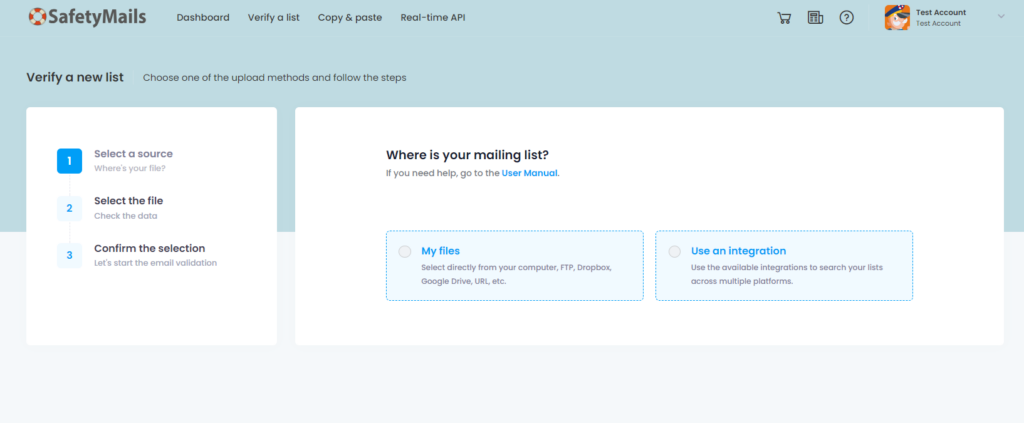
- Next, you should choose the upload source for the file. In this case, select “Use an integration.”
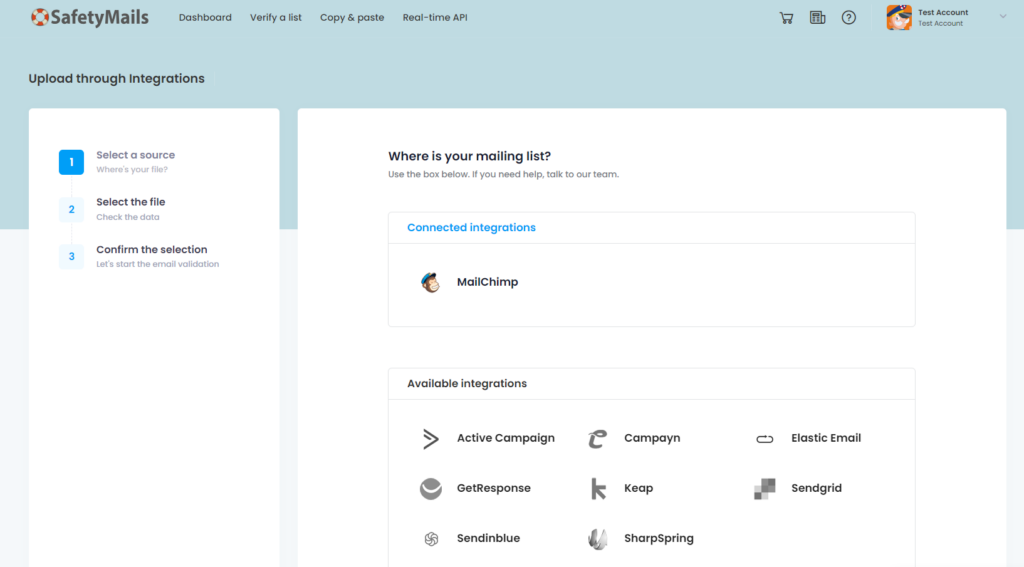
- On the screen that will be displayed next, choose the GetResponse option among the available integrations.
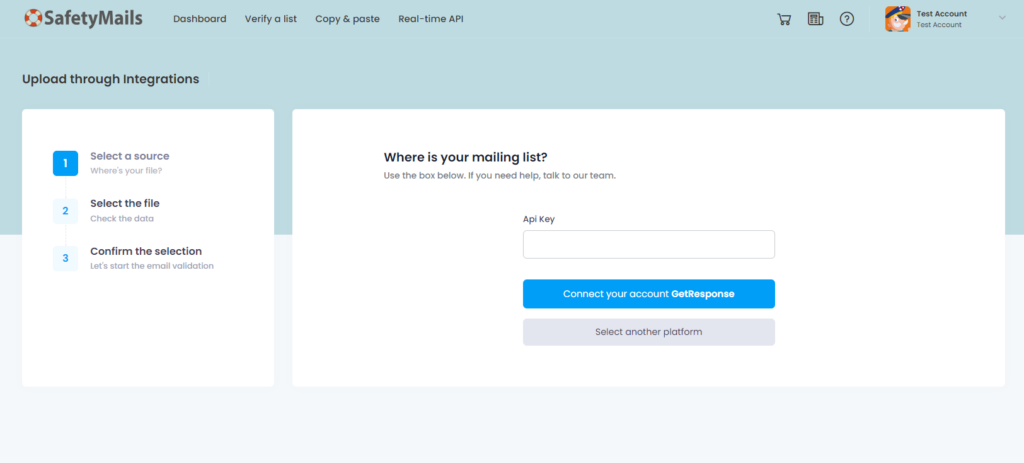
- After selecting GetResponse, you’ll need to connect your account.
- To obtain this data (API Key), access your GetResponse account and retrieve the API Key.
- Paste this information into the corresponding fields in SafetyMails and click on “Connect your account…”
- Once connected, you can choose one of your email lists in GetResponse to start validating emails.
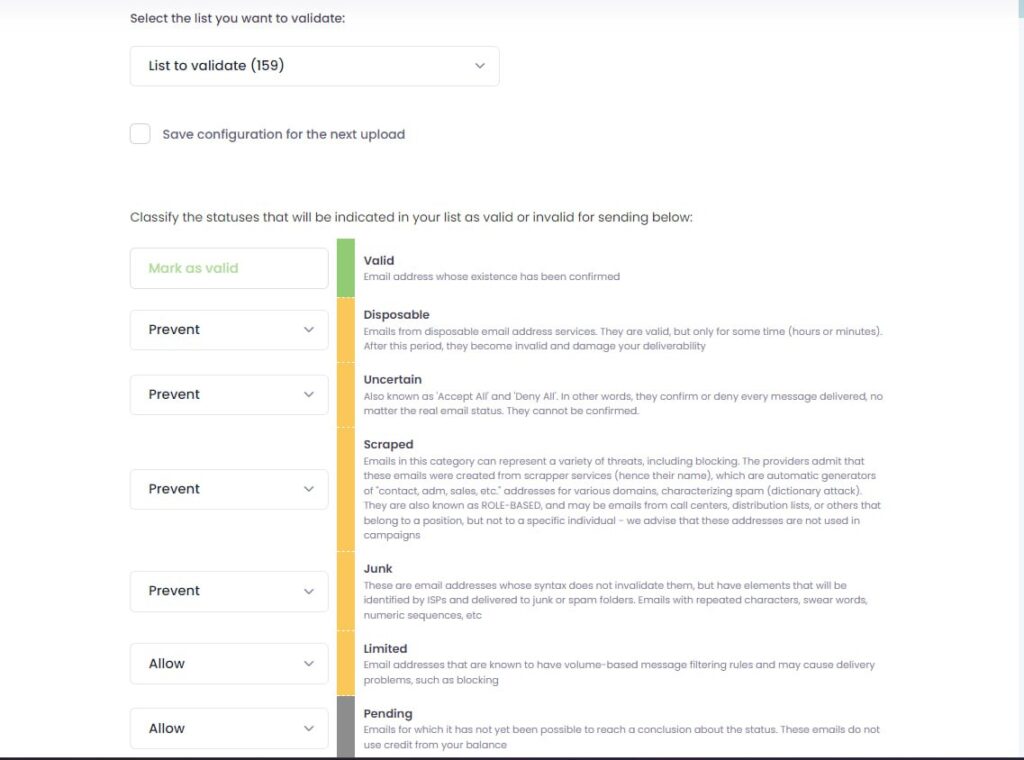
- When selecting a database, specify which statuses will be indicated as valid or invalid for sending, and choose whether to save your selection for the next validation.
Your list will appear on the main screen of SafetyMails with the following statuses:
- In processing: The file is being processed, and the email verification will start in a moment;
- Partial: There are still emails being analyzed, undergoing more in-depth algorithm resolution processes;
- Analysis: Indicates that the email verification is complete, and the list is now available for download and access to the analysis report.


